Teensy PCB Ardumower (T-Mow)

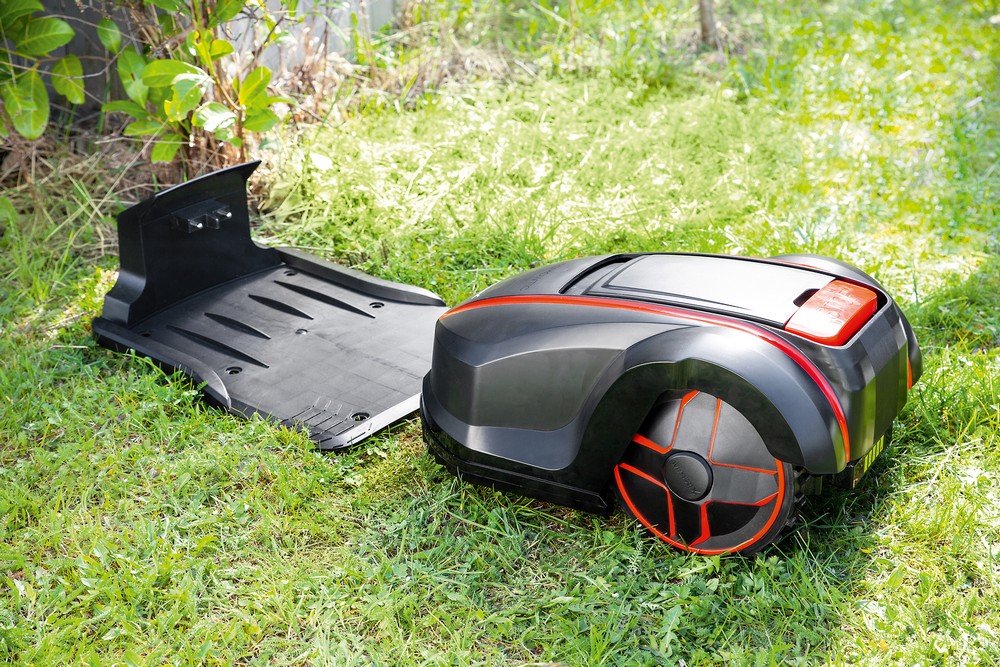
I used a Matrix MOW800 with this Driving Motors.
If you are looking for cheap motors and battery look at Ebay for it. I have buy 2 off them.
With luck, the battery is there and intact. They also have a charging station for a little €. If I remember correctly, charging station + charger 60 €
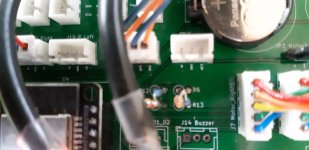
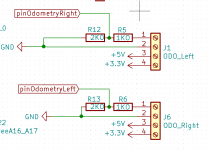
But I'm working on the integration of the motors into the software. They don't really want it yet. But they work already.
You need 3 off this Motor Driver for it.
 
@Bernard
Yes I know that. I am already glad that the Motors do move :)
Odometry comes next, I have to search in your code how to integrate it into the test code, that i can see the Ticks.
 
Sascha, your fault.... :D I just ordered 2x Matrix MOW800... but they are for sale without charging station. I think I will have enough things to do with thoseones, just to learn how to adapt PCBs etc... without thinking on printing strong PETG parts. My 3D printer will be used for smaller parts.
Thanks for your help ! :)
 
This part of code is easy it's simple interrupt management.

Code:
  attachInterrupt(digitalPinToInterrupt(pinOdometryRight), OdoRightCountInt, RISING);
  attachInterrupt(digitalPinToInterrupt(pinOdometryLeft), OdoLeftCountInt, RISING);

and

void Robot::OdoLeftCountInt() {
  Pulse01 = micros() - Pulse02;
  if (Pulse01 > 10  ) { // debounce for 120uS
    Pulse02 = micros();
    if (robot.motorLeftPWMCurr > 0 ) robot.odometryLeft++; else robot.odometryLeft--;
  }
  asm("dsb");

}

You have test on my git inside test file under interrupt test pin12
 
Sascha, your fault.... :D I just ordered 2x Matrix MOW800... but they are for sale without charging station. I think I will have enough things to do with thoseones, just to learn how to adapt PCBs etc... without thinking on printing strong PETG parts. My 3D printer will be used for smaller parts.
Thanks for your help ! :)
Oh no what have you done? :p
Now I am forced to integrate the Brushless Code into the Software.
I have asked them on Ebay, if they have Stations for the Mower.

@Bernard yes really. but sold as defective, it may be that something is broken
 
Ah ok now without Akku:
"As a spare part / defective without battery, accessories and charging station at most software problem"
The software problem is the intern who wrote the software and probably never tested. :rolleyes:
 
I'm trying to get Odometry running and was wondering why I don't see anything on Odometry Left, only the left motor is connected.
I noticed that the labeling of ODO_Left and ODO_Right is reversed.

Please remember when you connect the motors!
 
Hi Sascha, the seller has charging stations for sale, ...also for 69.90€. Is it a good deal or is it possible to build one who will do the job as good as the original, is it worth it ?
 
I can not complain, it is just a normal charging station with two charging contacts and the connection for the charger and two LED's.
The electronics have to come out anyway and the loop transmitter from Bernhard has to go in.
But there is no complete circuit board yet.
Is it charging station and charger for 69€? I do not know it at all more.

Here a picture:
1073588-21120719-Meahroboter-EK-9428216-web-Matrix-Maehroboter-MOW-800-24V.jpg
 
He wrote Ladegeräte, not Ladestation... I resent him a mail to be sure what he's speaking about. Thanks for this nice picture.
 
Last edited:
@Sascha are your R12-R5 Resistors correctly soldered ? Bernard changed R12 position, because in your case, 1/J1 is connected between R12 and R5 instead of on the right side of R5 ?
 

Attachments

  • 20210918_125812.jpg
    20210918_125812.jpg
    421.6 KB · Views: 10
Yes, on the picture from Bernard, is the previous version of the PCB, there was a small error in it, the resistors were set incorrectly
 
Yes, on the picture from Bernard, is the previous version of the PCB, there was a small error in it, the resistors were set incorrectly
I don't understand, for me the pcb is not like what can be find on schematics. 1/J1 is connected between R12 and R5 and not on the R5 right side.
 

Attachments

  • Screenshot 2021-12-16 at 21-23-45 Teensy PCB Ardumower (T-Mow).png
    Screenshot 2021-12-16 at 21-23-45 Teensy PCB Ardumower (T-Mow).png
    14.4 KB · Views: 9
Back
Top